How I Work: Input Devices
Apr 08, 2020
I struggled for some time with intense wrist pain. I suspected this was due to poor ergonomics while computing. Over the years I iterated through a variety of input devices (Microsoft Sculpt, Trackman Marble Wheel, Magic Trackpad) with limited success. My current setup has finally alleviated my pain. I can use the computer for a full work day plus hobby project time — all pain-free. The key to my setup is an Ergodox EZ keyboard and a handful of software tricks.
Ergodox EZ Keyboard
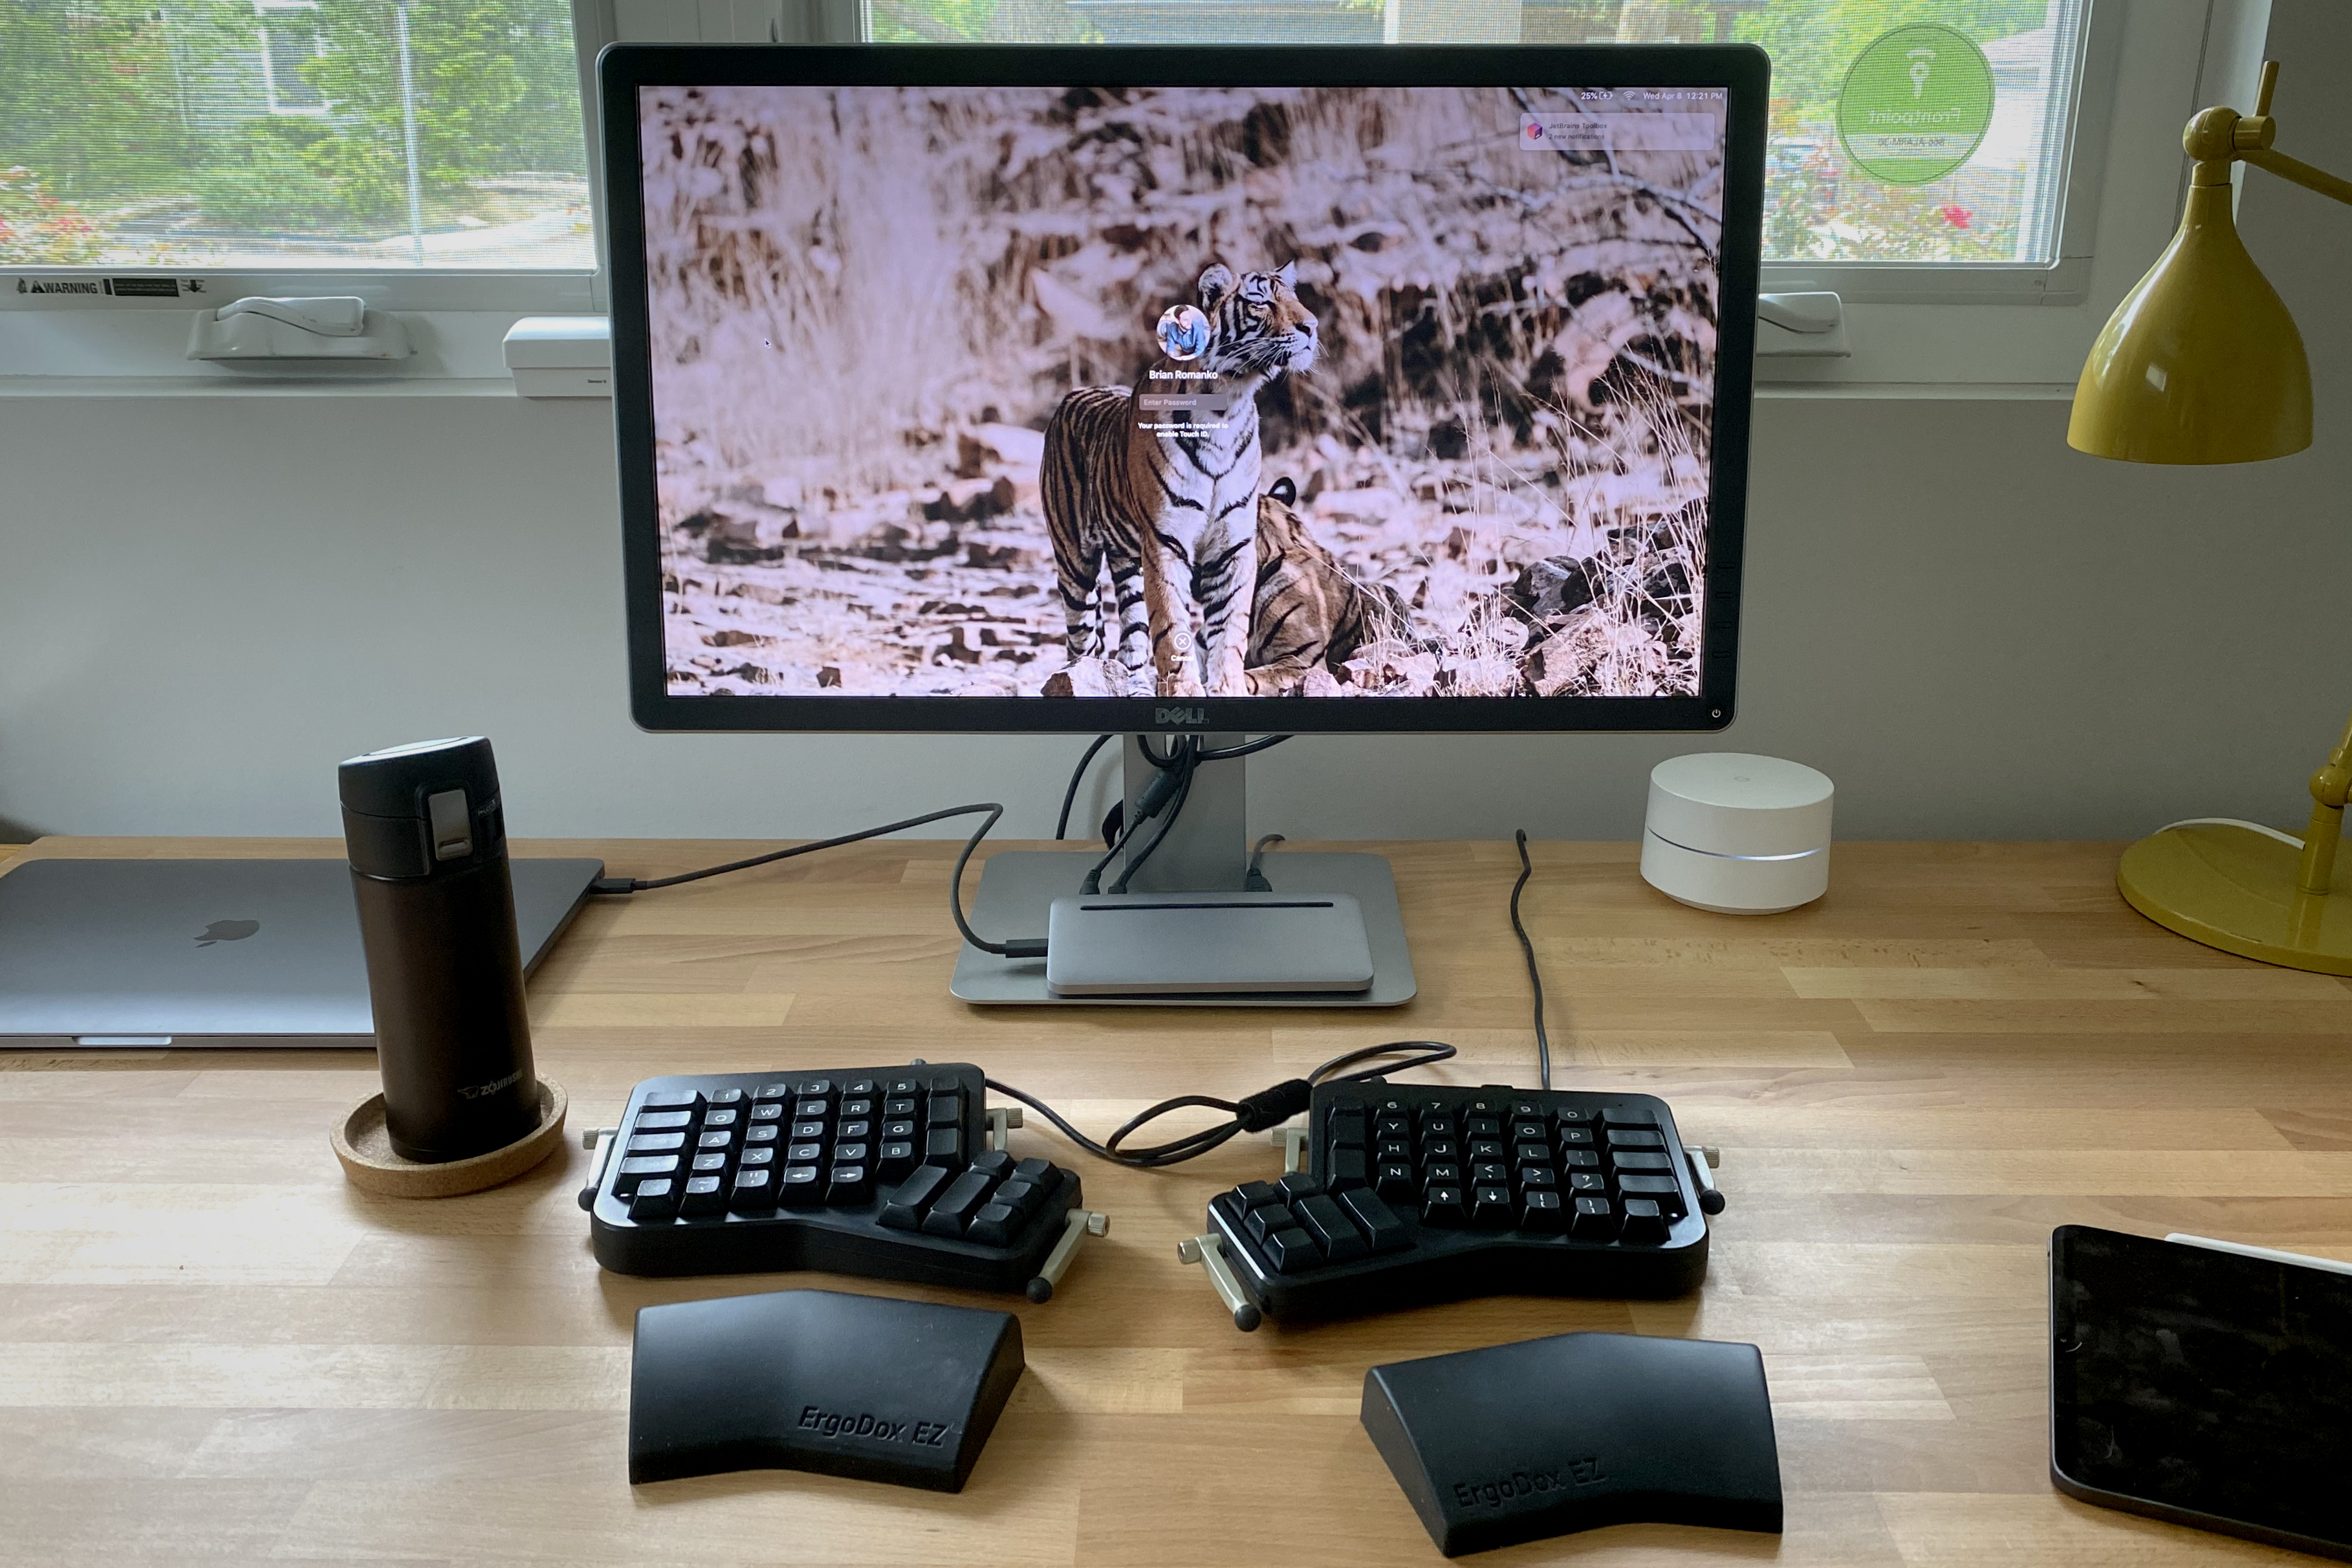
The completely split layout is what drew me to the Ergodox. It allows for your hands to be shoulder width apart. It also allows you to rotate the halves to whatever angle is most comfortable for your wrists. The below photo has a slight counter-clockwise rotation. I find the most comfort rotating the two halves slightly inward toward each other.
This keyboard was an intimidating purchase. First off, half the keycaps are blank. I thought I was a decent touch-typist but navigating a new keyboard without keycaps was daunting. More so the case when the key placement is novel. Also, there’s the price. It’s over $300 to take the dive. That’s a lot of money for an experiment. I wonder whether the high price gave me more motivation to learn. If the keyboard was $50 perhaps I would have given up after a few hours.
Despite being motivated to use the Ergodox it took me three weeks to get productive. I remember bringing it to work the first day, plugging it in and suffering to type a single email. I lasted about 30 minutes before giving up. I resorted to using it only for hobby work in the evenings and weekends. At about three weeks I found myself stumbling over keys at work and realized I was competent enough to switch fully.
Ergodox Features
The Ergodox Firmware, QMK, is very powerful. I’ve always been a keyboard-centric computer user. I prefer to keep my hands on the home row and have tried to avoid using the mouse. With the Ergodox I’ve finally been able to ditch any mouse/trackpad peripheral. I can do everything from the keyboard. In addition, I’ve been able to introduce a variety of shortcuts to increase my productivity.
Here’s my Ergodox layout. I’ll highlight a few of the biggest life-changers:
Layers
By holding a key, I can enable an overlay layer on the keymap. This is similar to how holding the shift key on a standard keyboard toggles keys to their uppercase equivalent. I’ve got three layers configured which allows me significantly more operations than the number of physical keys on the keyboard.
My base layer is used for the typical keyboard keys. Things like letters, numbers and modifiers.
My second layer is used to bring commonly typed special characters closer to my home row. Commonly used symbols (ex. (, ), $, #) are two rows lower than the number row.
My third layer is used for mouse and browser control. I can toggle this layer and use the e, s, d, f keys to move my mouse cursor. Thumb keys are used for clicking and manipulating the “scroll wheel.” While it’s not as precise as a mouse, it is more convenient and ergonomic. This is the critical feature that let me ditch my pointing device altogether.
Modifier Keys
Another feature is the ability to create momentary modifier keys. This allows the behavior of a key to change when it’s pressed versus when it is held. I’ve created several modifiers to allow for easy access to the CTRL and ESC keys.
- Hold my
zor/key to triggerCTRL - Tap the typical
Caps Lockkey to send anESC - Press a thumb key on Layer 2 to open the macOS character picker for easy access to emoji
- Press a thumb key on Layer 2 to send the screenshot chord to take screenshots without awkward contortions
Ergodox Learnings
I learned a few things in the course of using the Ergodox.
I didn’t realize how often I was opting to hold a modifier key and press a second key on the same half of the keyboard. This is not comfortable. You should be opting to hold a modifier key with one hand and typing a second key with the other. The comfort increase is noticeable but it’s been a difficult habit to break. Some folks go so far as to disable the ability to do this via Karabiner. I haven’t gone to that length but have become more mindful of the habit and look to create a parity of modifiers on either side of the keyboard.
I wish I had ordered the backlit version of the keyboard. Not because I do much typing in the dark. Rather, I would like a more obvious indication when a layer is activated. The non-backlit version has a single LED to indicate the activation of a layer. This is helpful but hard to catch out of the corner of your eye. If the entire keyboard was glowing a different color it would be immediately obvious if I accidentally toggled a layer.
Software Enabling my Keyboard-Only World
The Ergodox alone isn’t the only thing I’ve done to go mouse-free. Several tools have become indispensable.
macOS Configuration
The starting point for me was tweaking some settings in macOS for greater productivity.
- In Keyboard settings, enable “Use keyboard navigation to move focus between controls”. This allows tabbing through UI elements in dialogs and other screens.
- In Accessibility settings, enable “Reduce Motion”. This switches to lighter weight animations which run slightly faster than the defaults. I wish there was a way to speed the transitions up further but haven’t found anything.
Alfred
Alfred is such a great utility. It’s like Google’s Omnibar for your entire OS. I’ve got a global hotkey of Hyper+Space configured to open it. From Alfred I can type all sorts of commands to facilitate common interactions. Some of my favorites include:
- Type the first few letters of an application name to open it or bring it to the foreground.
- Type mathematical expressions to quickly compute values.
- Type keywords to perform actions like muting volume, locking the screen, or emptying the trash.
Karabiner Elements
Karabiner Elements is a utility to customize keyboard commands on your computer. I’m not a Karabiner power user by any means. However, there are two customizations that I can no longer live without.
I’ve reconfigured my Caps Lock key to act as a Hyper key. If you haven’t heard of a Hyper key, it’s a key that emits the combination of CTRL + Shift + ⌘ + ⌥. This is a combination of characters so difficult to type that it’s unlikely to conflict with other shortcuts. It enables Hyper+x shortcuts. The A Modern Space Cadet article is the source of inspiration for this technique.
The Ergodox is capable of performing this Hyper remapping. I do it in Karabiner because I want consistent behavior from my Macbook keyboard. I haven’t notice any downside in doing this via Karabiner vs native on the Ergodox.
With Hyper enabled, I have now created a series of Application shortcut keys which can be triggered via Hyper+key. For instance, pressing Hyper+U will switch to Firefox. Hyper+J will switch to my terminal. This is significantly faster than using ⌘+TAB to navigate between applications.
Moom
I like to focus on one application at a time. This restricts the number of things that can pull my attention away from the task at hand. I needed a quick way to expand the size of an application’s window to cover the entire screen. macOS does provide Full Screen support, however it forces the window to run in a separate space. Navigating between spaces has an animated transition which extends the amount of time it takes for the next app to appear. I want that transition to be unnoticeable.
Moom is a window manager that provides keyboard shortcuts for common window sizes. I can trigger Moom for the active window with Hyper+Up. Then I can press Space to make the window take the full screen, or an arrow key to take half of the screen snapped to the edge indicated by the arrow. This is useful for cases where I’m referring to material in one window and taking notes in the other. Right now I have Firefox filling the left half of my screen and Bear on the right.
Vimium
Unfortunately, web browsing is difficult to do via keyboard. Tabbing through hundreds of UI elements is exhausting. Using a keyboard-driven mouse is also annoying. Vimium has proven to be the accessibility tool that makes using a browser via keyboard possible. It is a browser extension that provides Vim style keyboard control to your browser. You can
- Scroll the page contents using
jandk - Switch tabs with
JandK - Navigate back and forward with
HandL - Press the
fkey to trigger keyboard shortcuts for all in-view clickable elements.
That last point is a game changer.
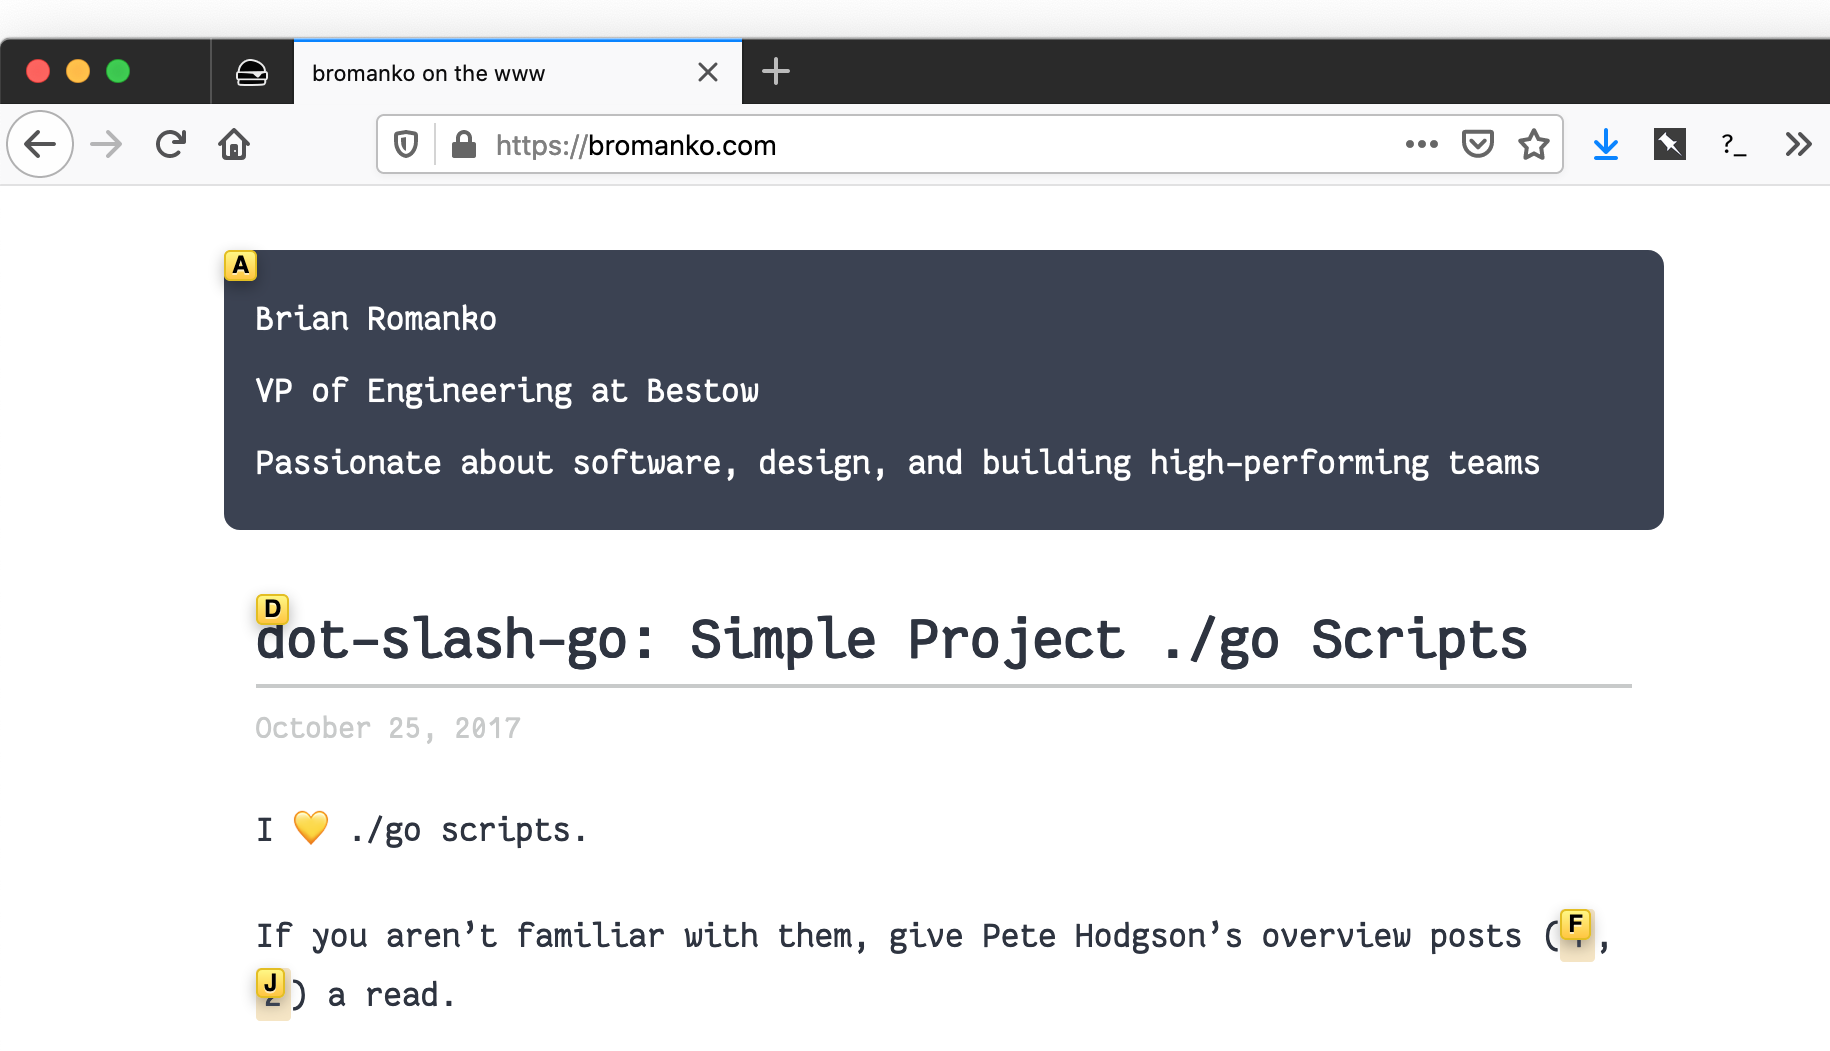
I can click on any element on the page by pressing f and then pressing the series of keys in the yellow overlay corresponding to the link I am interested in. This makes pretty much any UI element keyboard accessible with only a handful of keypresses. Folks that have used Vim’s EasyMotion project will find it immediately recognizable.
I continually tweak this setup and predict this post won’t reflect reality a year from now. Sounds like most of technology.